

Dodge and Burn?
/I knew about this simple technique from the very start of my shooting career but I wasn't much into Photoshop at the time. Even after I was, I didn't give it much notice. Sad really.
The differences between a shot that hasn't been trimmed out with some dodge and burn will almost certainly look flatter and less interesting. And it's really very easy to do. Well, like anything else, I've seen people who spend hours just doing the dodging and burning on an image. So, for SOME it's easy. I typically spend a whole 2, maybe 3 minutes going over an image to bring it to life.
One of the things that dawned on me one day (don't laugh, it happens) is that my whole life of studying the female body, as most boys do, has been to prepare me for the time I became an artist. Knowing the details of muscle structure in legs and bones around a neck is very important when figuring out where to paint.
That is another reason I love D&B. I am an artist. When I dodge and burn I'm using a brush and doing it the way I like it to look. I'm doing it as my mind's eye measures my strokes to make the image more mine than reality's.

Here is a link to an action that creates this for you. But you should still read it over to know how and why it works.
To do this right in Photoshop the best way is to create two layers of grey and set them to 'Overlay' as you see here. By doing them in overlay the grey is transparent over the image. This allows you to see where you have dodged or burned better as you work too. Think of these layers as clear plastic sheets that allow you to add your changes and then change the opacity afterwords if you have over cooked it a bit. Having the two laters to place your digging and burning separately allows you to change the opacity on each independently.
Now, the technique to start with is actually fairly simple. Make the lighter areas lighter and darker areas darker. Usually using a wider brush so it blends well. Change size based on where you are painting.
As you can see in the examples, arms and legs can be much more shapely with some dark on the edges and lighter down the center. This depends on where the lights were set up of course. Side to side lighting might have lighter on the sides and darker down the middle. It's important to taper and shape with the leg or arm and take into account the muscle structure. You can make a calf really stand out when the original image might not have that noticeably.
One VERY important thing...use a tablet to do this editing. Having a pen to give you control over how hard the brush strokes are can't be stressed enough. Imagine a mouse as a paint roller and a tablet as a fine paint brush. A roller is either on or off. Great for...well...painting the studio floor. The brush responds to how hard or soft the pressure is. If you haven't taken the leap to a tablet, it's a must do!!
Enjoy and I hope this gives you another little tool to refine your personal style.
TAP TO SEE THE DIFFERENCE!!


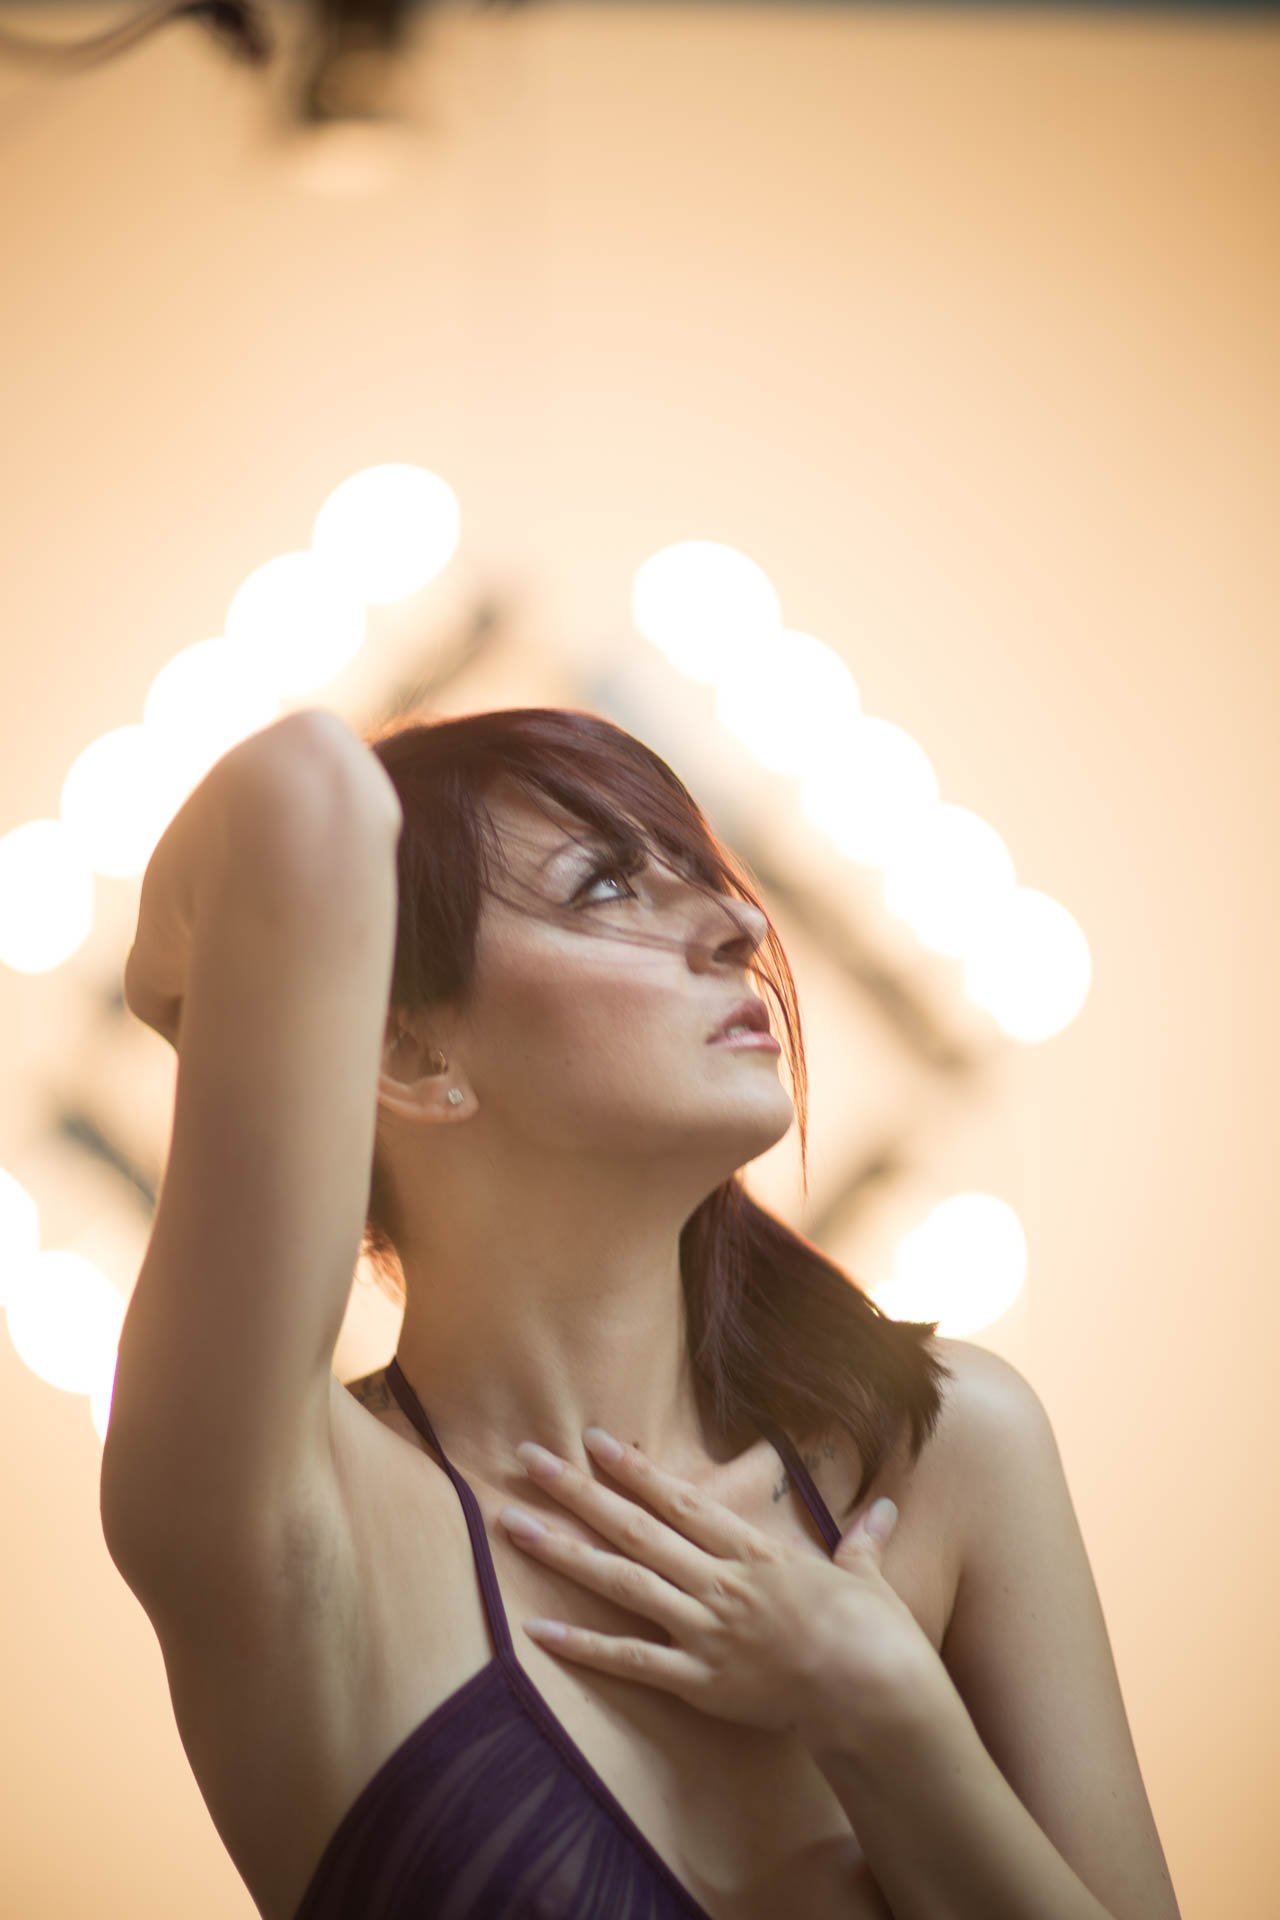
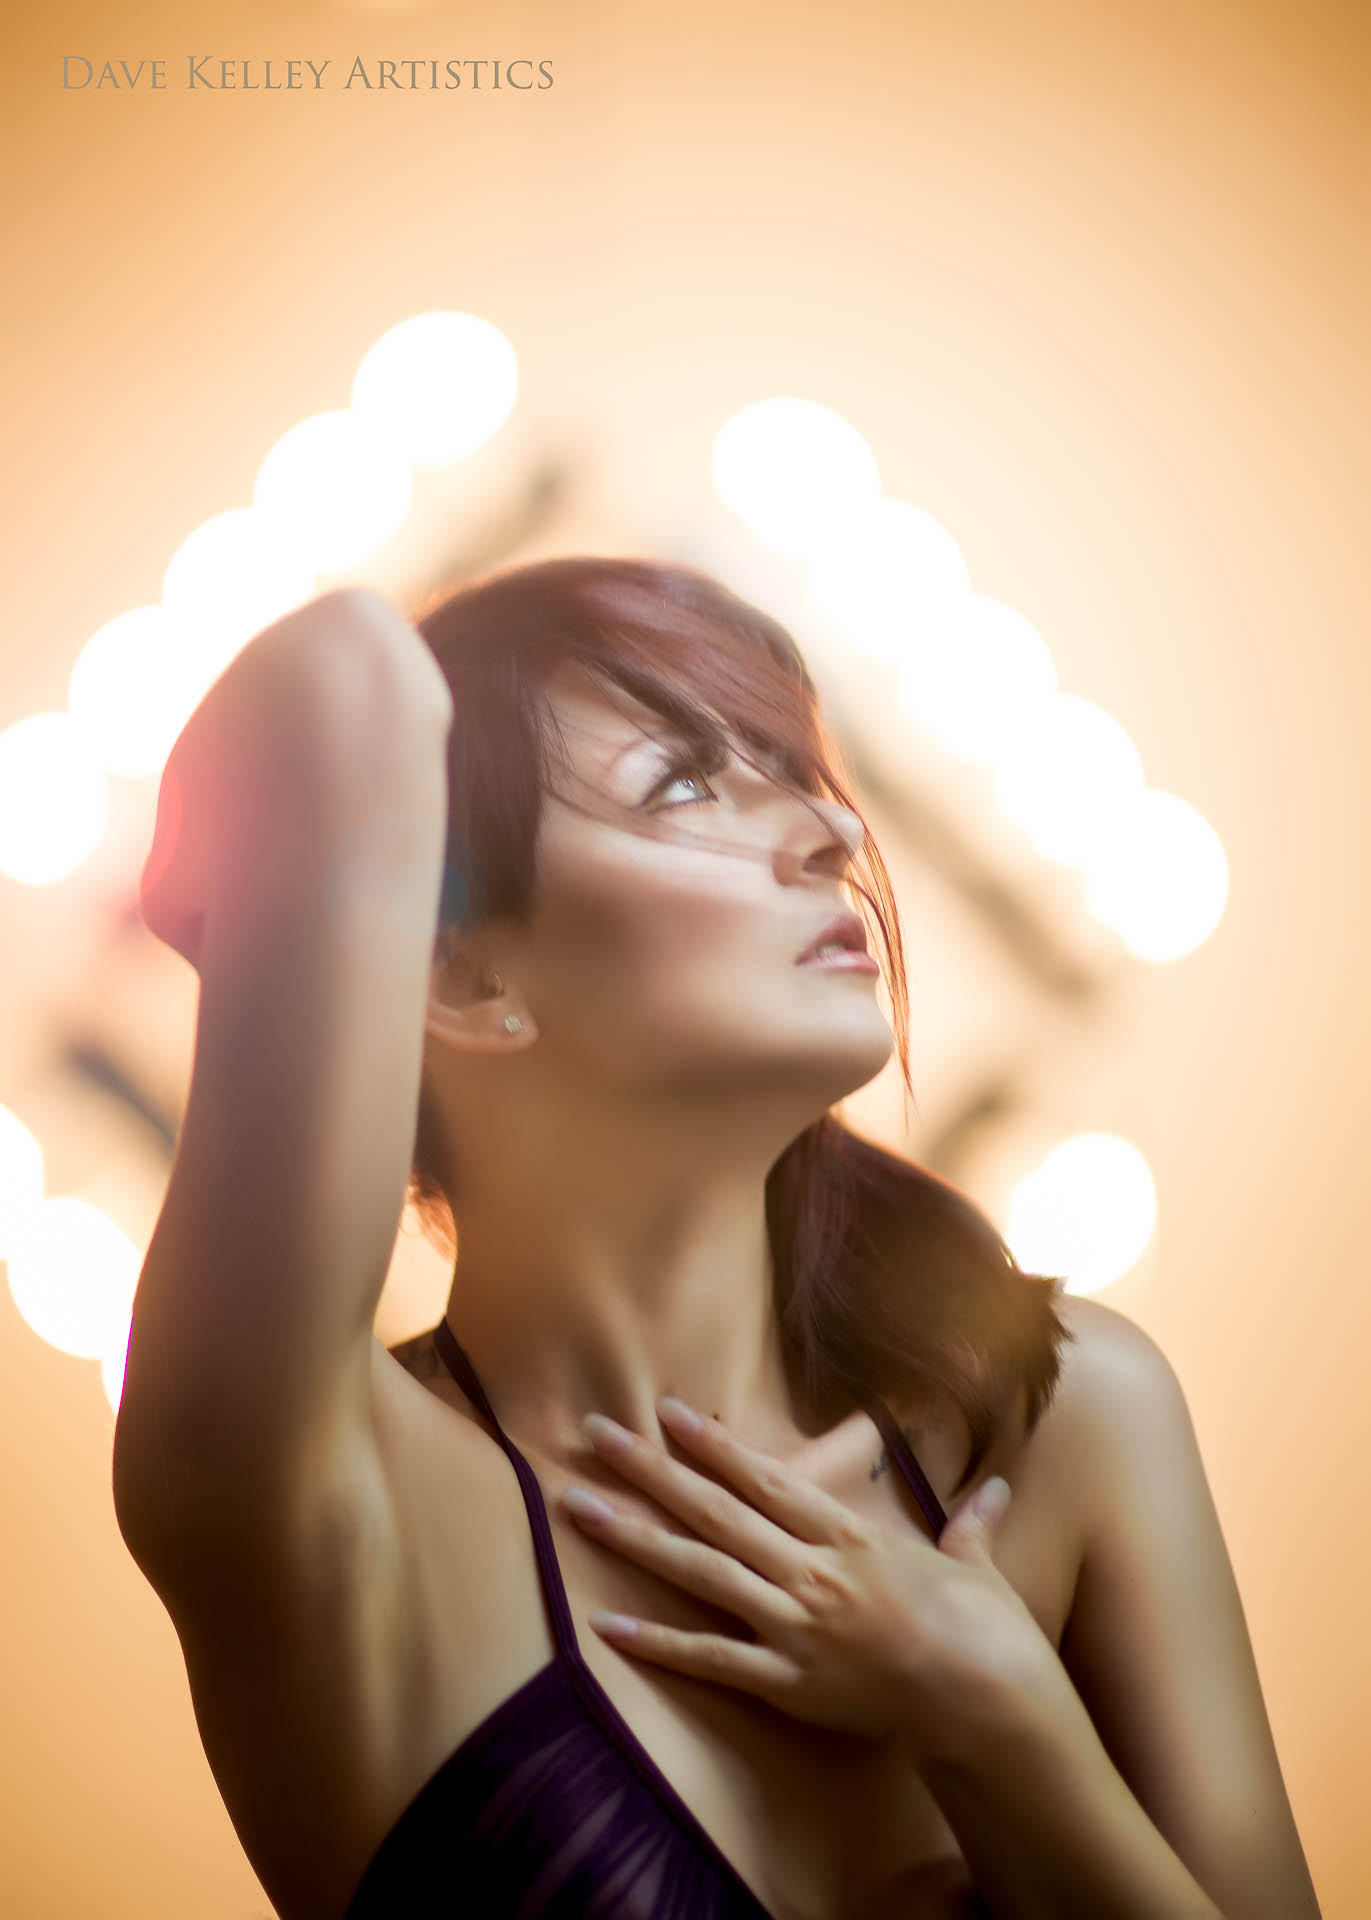
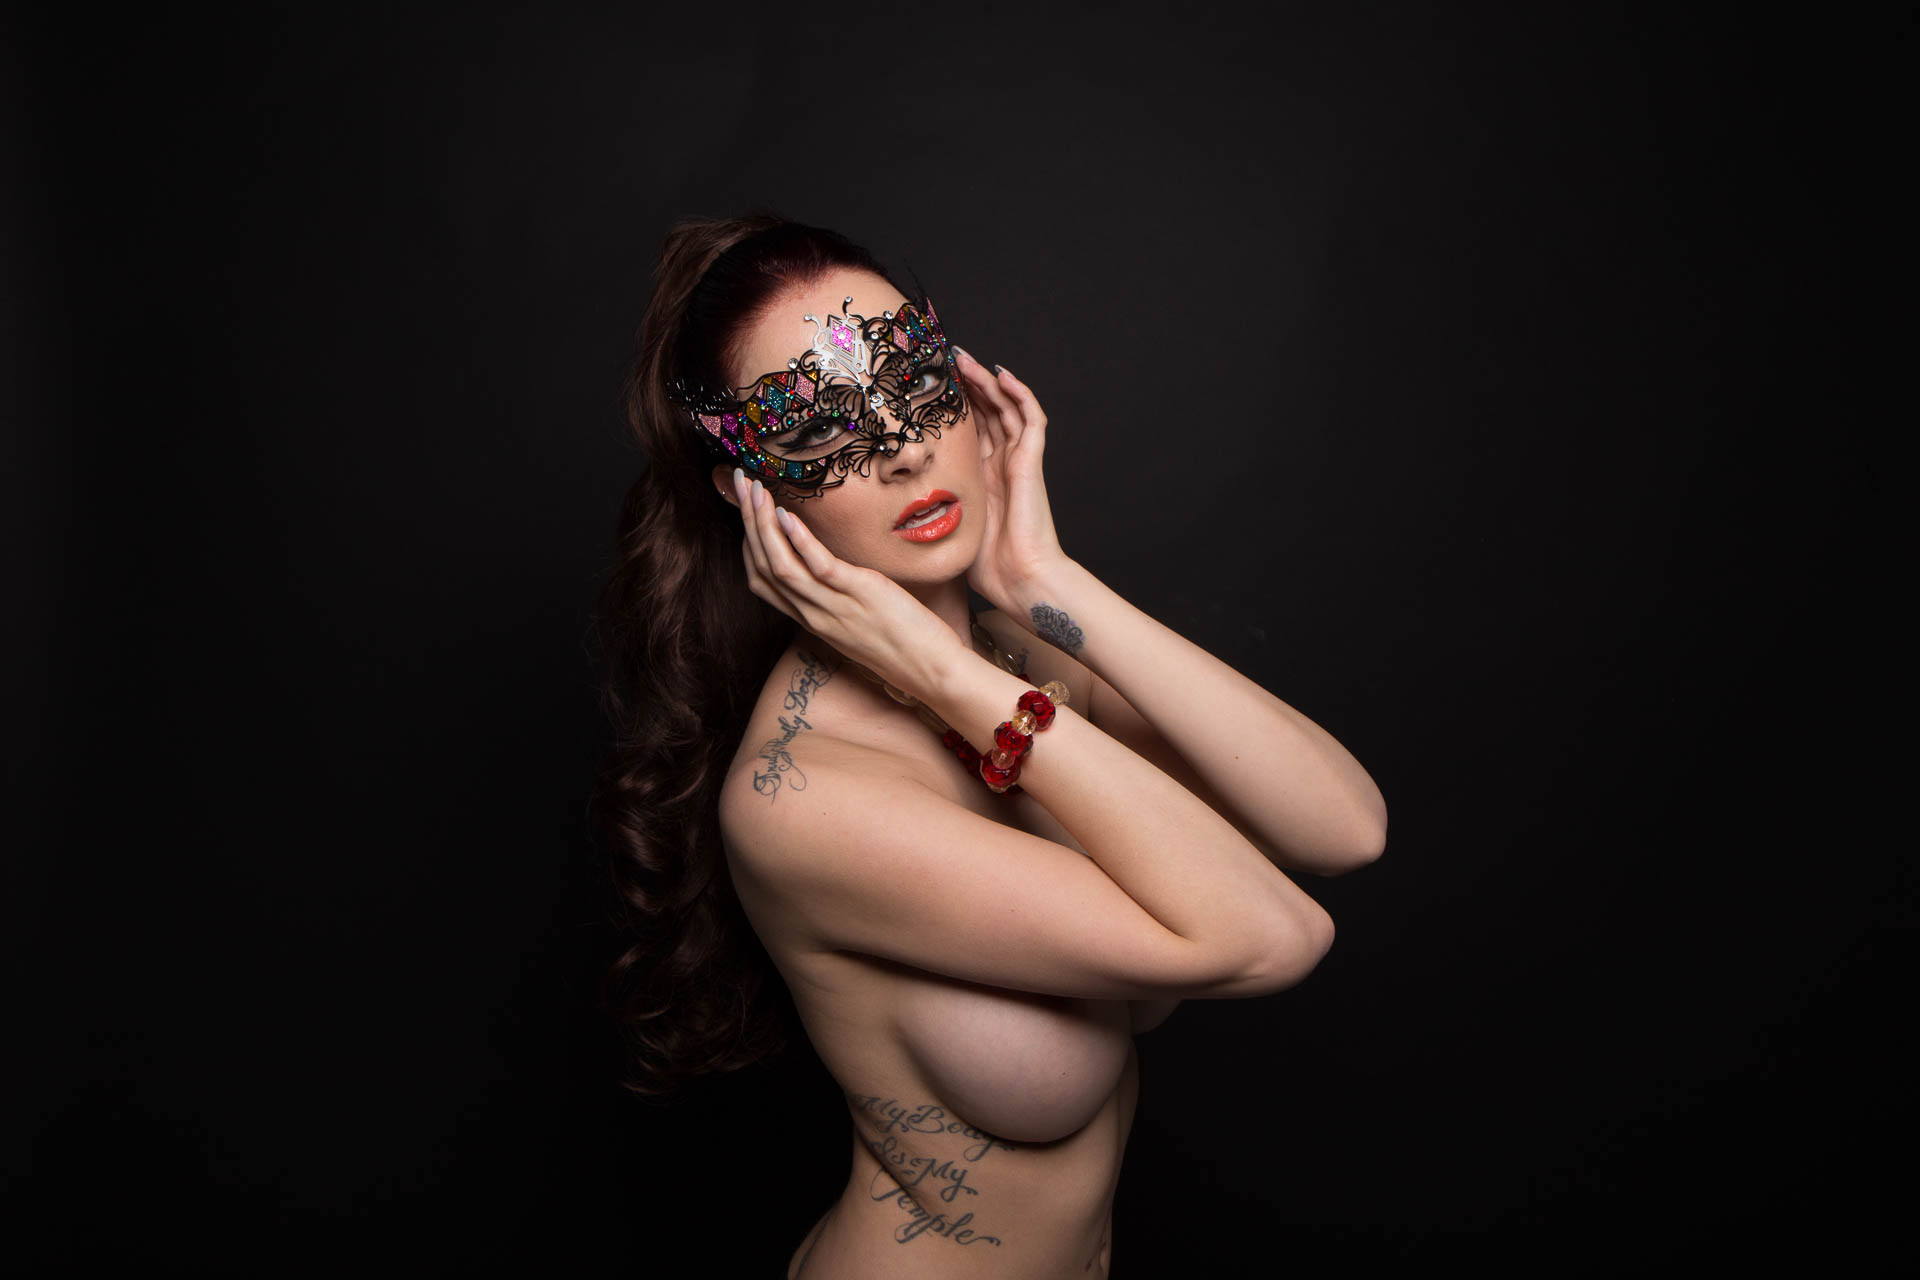
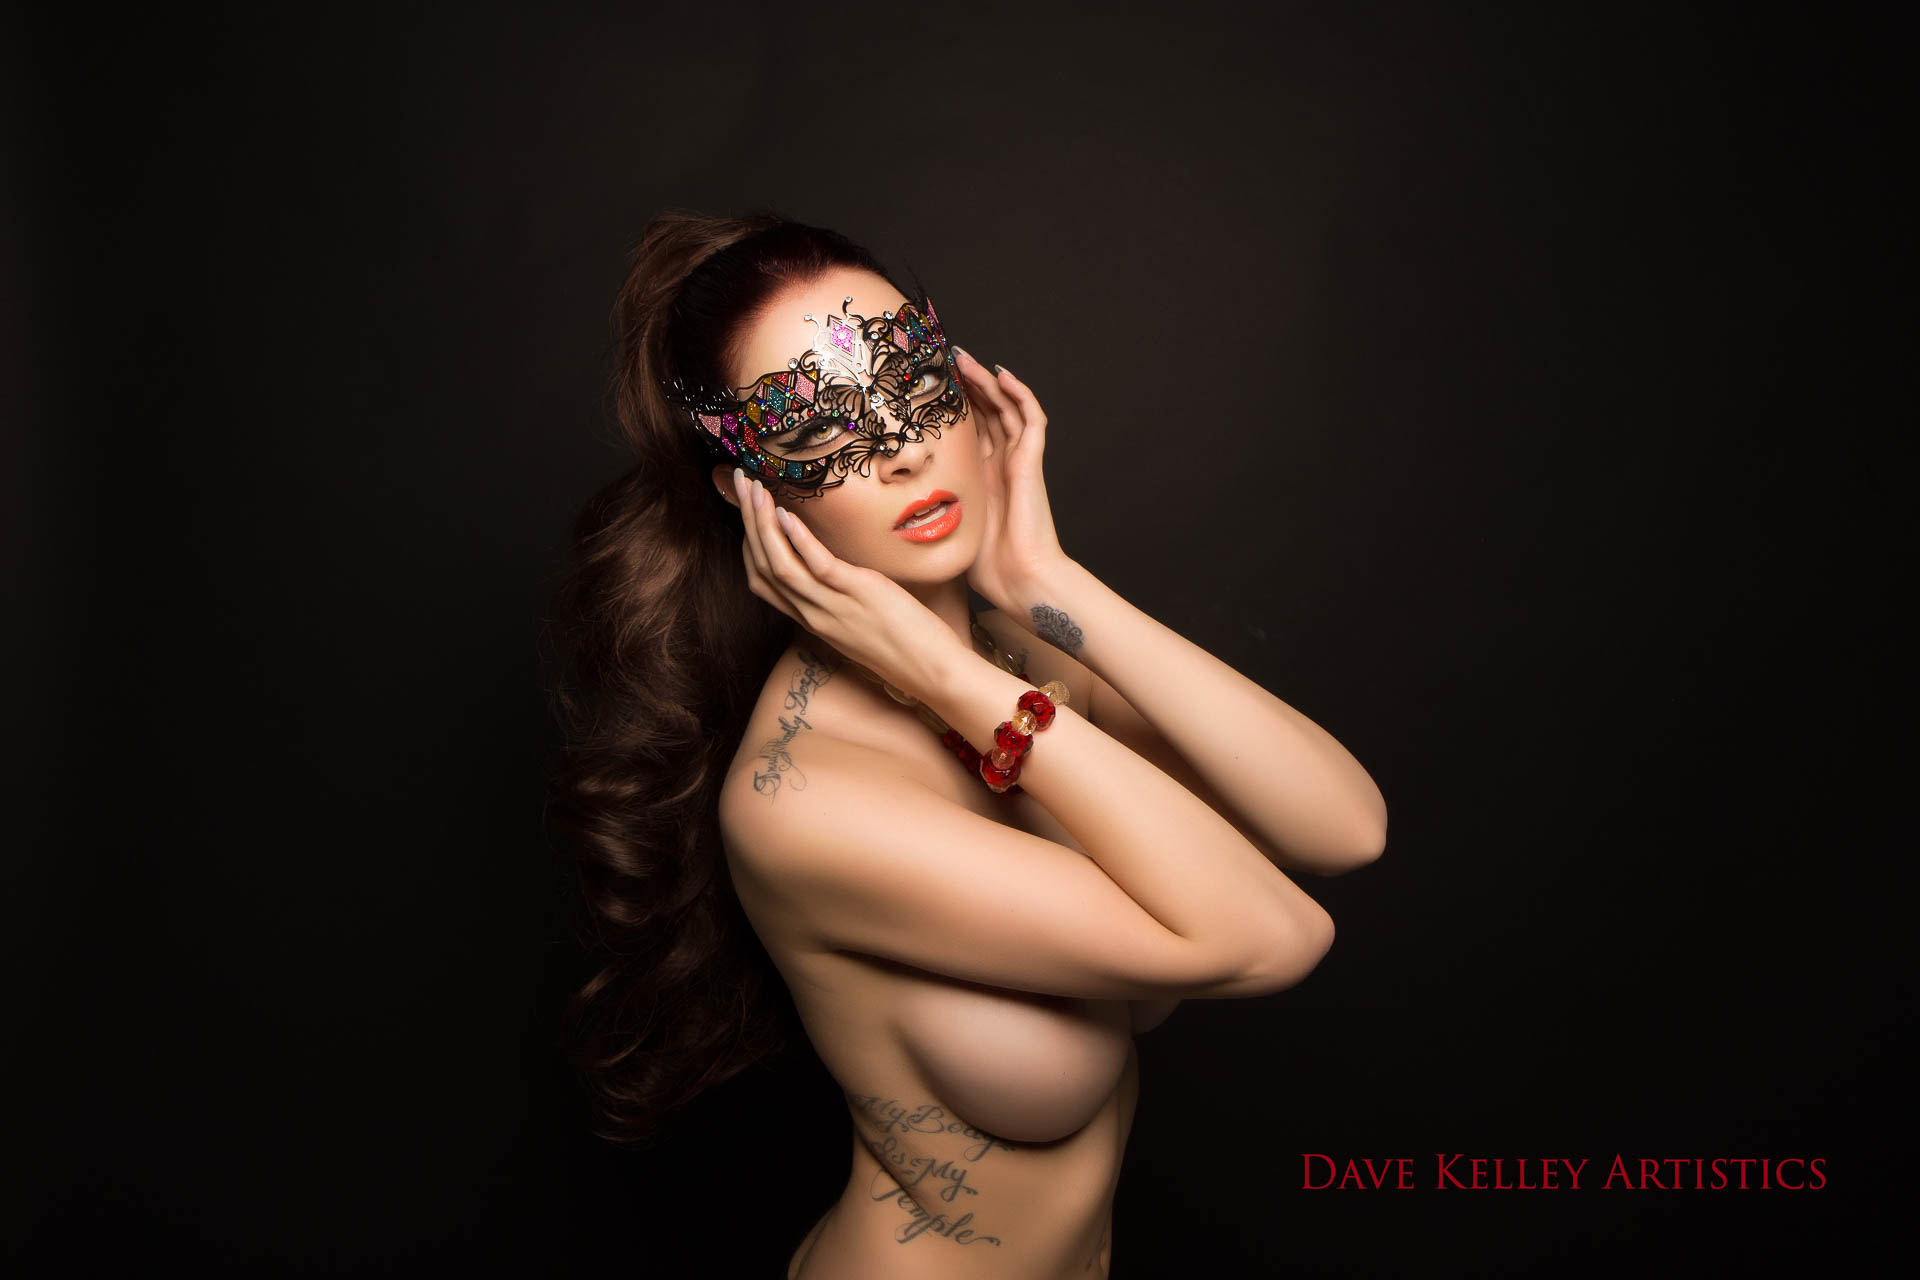
Tap on the image to flip back and forth between edited and non-edited. Note the 3D effect.